Windows – Mineral Deposit Staining

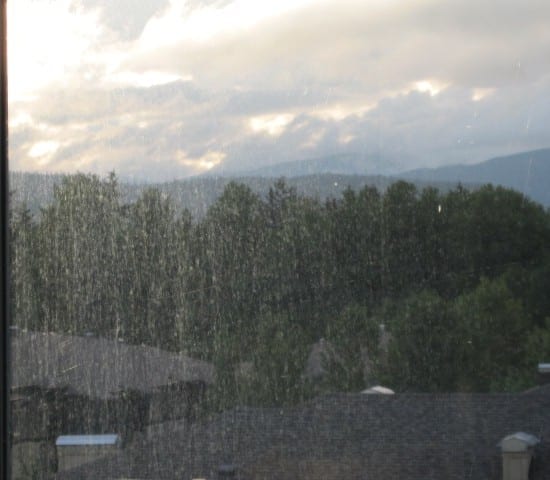
Hopefully, you haven’t seen this on your windows – milky drips or streaks that won’t come off. They’re translucent, most visible in direct sunlight, and most noticeable right after your windows have been cleaned.  You can complain and have the window cleaner come back – but watch him scrub the glass, and these marks still don’t disappear.    These are mineral deposits staining your window.

These marks are an assortment of minerals leached over time from mortar and concrete by the rain.  When the rain strikes the building then runs down the surface of the glass, it leaves these residues behind.  They adhere to the porous surface of the glass, building up in vertical streaks or running water patterns over time, and gradually adhering and becoming permanent.  They can also look like spatter marks if rainwater hits a concrete ledge below your window and bounces back up on to the glass.   The longer those minerals stay on the window, the more visible the build up becomes and the more difficult to remove.   The good news: mineral deposit stains are removable in most cases if you catch them in time.

There are solvents designed to combat these stains, and we have the know how to use them.  Combined with razors, glass scrubbing pads, and effort, mineral deposits can be greatly reduced and in most cases removed.  However, the degree that they stain and etch themselves into the glass worsens over time.  If they’ve been sitting on the glass for more than two years, they may not be able to be removed completely.  After several years, the appearance may only be improved by up to 80 – 90%.   In these cases, the best way to bring back crystal clarity to your view through the glass: install new glass.

So, in order to ensure these mineral deposits to not occur, take the following steps:

  • Wash the exterior surface of windows at least once per year
  • If any mineral deposits appear to be on the glass, get a professional to remove them – sooner rather than later
  • Install a drip cap above the window, or extend this awning like guard to prevent       water from dripping down the glass when it rains.
  • Lower window ledges that are concrete should be treated with a sealant or covered: paint them, put a planter over it, or just be aware to keep the lower half of your window clean.  (Clean it at least once or twice per year)

If you have mineral deposit staining on your glass, and need to get it out, contact ServiceMaster Clean Residential: We’ll take care of it.

Filtration Marks – What Are They?

Filtration marks occur where a gap under the carpet exists allowing air to pass through. This air flow allows the carpet to act like a filter, trapping and accumulating oily, non-soluble airbourne particulates – cooking oils, smoke, vehicle exhaust, dust, etc.

Air flows down walls through cracks in concrete flooring, and crevices, joints in the wood flooring, etc as the building breathes. The more movement of the air there is, the more this occurs. Look for filtration marks in areas with electric baseboard heating, ceiling heat, wood or pellet stoves, HVAC with no air return vent, etc, (perhaps it’s time to c all in a HVAC Company). In any well sealed structure return air must come from somewhere as a vacuum is formed when air is forced out or around a space. This results in the air being drawn through cracks and crevices – sucked in under and around doorways, gaps in the carpet as we mentioned above.

What to do about it?: an alternate source of air return must be made. This can include having a new Fargo air conditioner installed, adding an air vent near to an existing HVAC unit, or leaving a window slightly open so that air can be drawn in from outside rather than sucked in wherever possible.

In buildings with HVAC in the hallways, no vents, or windows to open: install carpet with dark edges near the walls. White carpet or light colored carpet will make this issue highly visible. Or you may be able to enquire about a ventilation system that can reach areas like this with a company in air conditioning repair Denver CO area, because perhaps your AC is not working properly. You may also want a new updated model to meet your house’s demands.

Cleaning filtration marks will require several steps.

1) Vacuuming to remove loose soil. This needs to be accomplished with an edging wand as normal vacuum attachments won’t get close enough to the wall. Infrequent vacuuming with an edging tool can lend to the development of filtration marks in buildings prone to this problem. Edging must be a frequent part of the vacuuming maintenance process.

2) Several applications of pre-spray and hand agitation may be necessary to loosen the non-soluble materials. The chemicals will need to be worked into the fibers of the carpet to loosen the bonds along the length of the fibers in order to improve the appearance when finished. Thoroughly shampoo and extract the area.

3) Repeat.

This will be a lengthy process, involving a lot of kneeling and hand scrubbing, using edging tools and working the carpet. The appearance will likely be improved, but is likely to remain discolored.

Note: in my personal experience, this will lighten the markings by aprox. 50 – 80%. The longer they are present the more permanent they become.

Carpet Abrasion – Real Soil vs. Apparent Soil

Abrasion of carpet fibers negatively affects the carpets appearance – it causes permanent damage and gives the illusion of  “Apparent Soil”.

Abrasion: “Dull, dark areas caused by scratching of the fibers from particulate soils.  This will appear to improve when the carpet is wet.”

There are two types of soil according to the ESTEAM Cleaning Schools Carpet Cleaner’s Handbook – Real Soil, and Apparent Soil.

Real Soil is defined as “…any matter that is foreign to the construction of the carpet and which can actually be removed from the carpet.  Remember, carpet acts as a filter in the indoor environment by trapping soil, such as animal and human dander, gases, and soils such as sand, grit, food, hair, and ashes, etc.”

Apparent Soil:  “Appears as soil but cannot be removed because it is not really soil.”

During the snowy winter conditions in Vancouver, sand and salt are used outside building entrances to prevent slipping.  This soil is tracked into the building and trapped in the carpet fibers.   This ‘Real Soil’ should be removed as much as possible with frequent vacuuming.  A beater bar vacuum cleaner will give best performance.   This will reduce abrasion of the carpet fibers.

The longer the soil is allowed to sit on the carpet, the more it will become distributed throughout the building due to the mechanics of soiling.

“Most soil that accumulates in carpets is from the soles of shoes, specifically in the main entrance of the home.  Soil is transferred to the carpet from the shoe sole until the carpet is as soiled as the sole of the shoe.  At this point, some soil will transfer to the shoe sole and be re-deposited on a less soiled area of the carpet.  This is how traffic areas develop and spread… It is estimated that 74% to 79% of the soil in most carpet is dry particulate matter.”

That percentage will be much higher after the type of winter we’ve just had – thanks to the sand and grit from outside the building.

The Solution: Deep extraction carpet cleaning.  Get the abrasive particles out of the carpet, especially before they become redistributed, spreading the problem.  Waiting to clean carpets that are heavily soiled will result in larger areas of the carpet becoming permanently damaged with wear patterns.  Scratched and cut carpet fibers cannot be repaired through cleaning.

How else can this be reduced?  Use of entrance mats, removal of shoes, and frequent vacuuming.

A Carpet Saved

“I told her not to touch it.  Then I got my hammer.”

A few years ago I got a call from a lady who was a regular customer.  She had just put down in her place brand new   carpets – ten days old – bone white rug.  That night she was having a dinner party for ten or so people.   One of the dishes she was famous for was French onion soup.  So she had a big 2-gallon clay cooker full of French onion soup with about four pounds of cheese on it in the stove.

She didn’t know but some time ago her husband had dropped this thing (the clay cooker).  The handle snapped clean off.  In his wisdom, because it fit so perfectly, he took the handle got some clay glue, and glued it back on.  He thought, “No one is going to know this.”

So she is carrying this huge clay pot to the table and the handle comes off in her hand and it turns turtle right on top of the carpet, face down, onto the brand new rug.  She just snaps!  She didn’t know her husband was responsible at the time, and of course he ran out to the garage to get the shop-vac when she started screaming.  This was on December 23rd.  The dinner party was set for eight o’clock that night.

She calls me and asks, “What do I do?  Cheese is still boiling on the carpet!”  I told her, “Don’t do anything with it.  Grab a box.  Cut a couple of holes in the top of the box, and turn it upside down so no one goes and steps in it, and leave it.”

When I got there, it was just a mass of molten cheese.  I went in with a compound that froze the cheese down to like minus one hundred degrees Celsius.   And then I took a hammer, and I just hit it, and it shattered into a million pieces.  And I just vacuumed up the frozen cheese.   Rather than trying to pick it out. You’d be there forever and a day and you’d never get it all.

Then I peeled up the carpet, and underneath was a big pool of onion soup in the under pad.  I cleaned that up, cut out a big square of under pad, cleaned the back of the rug, cleaned the front of the rug, put a fan on it, and said “I’ll be back in an hour.”  I went down to the van, got a big chunk of under pad and laid it down.  Not a problem.

She was tickled.  She had visions of having to tear up this really expensive carpet that was ten days old.

Done.   Perfect.  Carpet looked like new again.

-story submitted by one of our carpet cleaning technicans

Overflowing Gutter Issues

“Why is this gutter still overflowing?  We repaired the caulking at the seams, repaired the downspout.  It (the gutter) has been cleaned, so why does it keep spilling over?”

This is a question we received from a property manager regarding a situation we’ve encountered often before.   The answer was confirmed on site by one of our gutter division technicians.

If gutters are not working correctly necessary repair may include reattaching damaged or disconnected downspouts or re-caulking leaky seams.  In the instance involved with this question, both items had been performed at this particular section of gutter, which was found to still be overflowing.  Then, investigation into additional factors occurred.

Bringing a hose up to the gutter and flooding it with water demonstrated the problem.

By doing this we ensure the downspout is draining properly by observing the water level, but it also demonstrates the angle at which the gutter is sitting.  This angle can be incorrectly set during installation, or can change as the building settles and shifts over time.  Watching the water level rise as the technician pumped it full of water showed that the gutter was sitting at the incorrect angle.  Water flowed to the end of the gutter that was capped, rather than to the end with the downspout.  Therefore, during heavy rain, the gutter would fill up and spill over rather than flow down and out the drain spout as it should.

My crude pictures demonstrate on a short length of gutter how the water always fills a vessel and yet remains level, regardless of the angle of the vessel (in this case gutter) in which it sits.   Take the example above of the second gutter above, and apply it to a long section of gutter, and you get something like this:

During heavy rainfall, water will accumulate faster than it can drain out, especially since the low end floods and fills first, only being allowed to drain once the water level rises high enough to start escaping through the downspout.

Solution: The gutter needs to be removed from the building, and reattached at the proper angle to allow the water to flow down and out through the downspout.

Fern Barker – Senior Property Manager CROSBY PROPERTY MANAGEMENT LTD.

As a Property Manager I have worked with ServiceMaster for approximately 14-15 years in a variety properties. The quarterly carpet maintenance service they offer has been extremely well received by my clients and has been most beneficial in extending the life and look of the carpets. ServiceMaster staff have always ensured that my clients have been well serviced and in some cases gone out of their way to look after a problem I thought could not be fixed. I can truly say that I have found the pricing as being well within the market range and the service to be excellent; And working with David and many of the other staff members over the years has been a supportive and pleasant and co-operative arrangement.

Dave Olafsson – Property Manager Crosby Property Management Ltd.

I have been in the property management business for 13 years. When I need work done, … either carpet cleaning, window cleaning service, difficult or tricky projects, ServiceMaster has always been able to help. They are quick to respond to any request or problem, and I can wholeheartedly recommend them.

Andrew Achtymichuk – Property Manager AWM Alliance Real Estate Group

I have been using ServiceMaster for the past 2 years for cleaning the gutter, windows, ducts and carpets. They have always done an excellent job, very professional and if there has ever been a problem, they rectify it immediately. If I ever have a question that is in their field, their knowledge is second to none, ServiceMaster knows their job, inside and out.